
Mailcow: Configure Amazon SES for domain Outbound SMTP
A configuration guide to use Amazon SES as the outbound SMTP for a domain in Mailcow.

This post will introduce and go over setting up Amazon Simple Email Service (SES) to function as your outbound SMTP service on Mailcow for the domain we verified in SES.
In another post I went over getting set up with Amazon SES and then getting out of the sandbox, into the SES production environment.
In yet another post I went over getting Mailcow setup on a cloud provider. In my specific instance, I used Hetzner cloud to take advantage of their free cloud firewall product.
Create Amazon SES SMTP Credentials
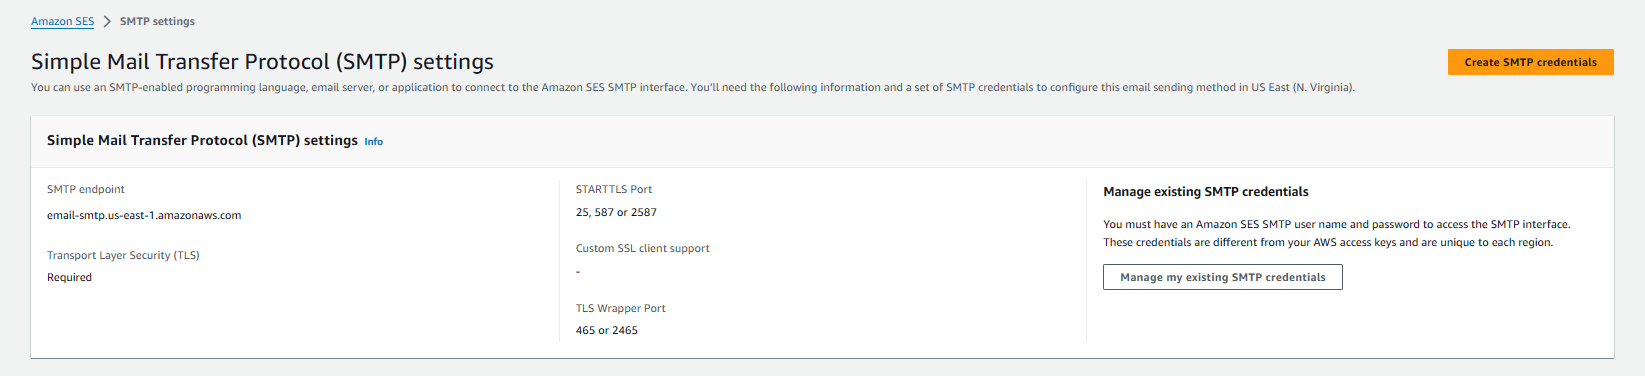
To add Amazon SES SMTP credentials, navigate to the SMTP Settings page in the sidebar when logged into AWS in the Amazon SES product page.
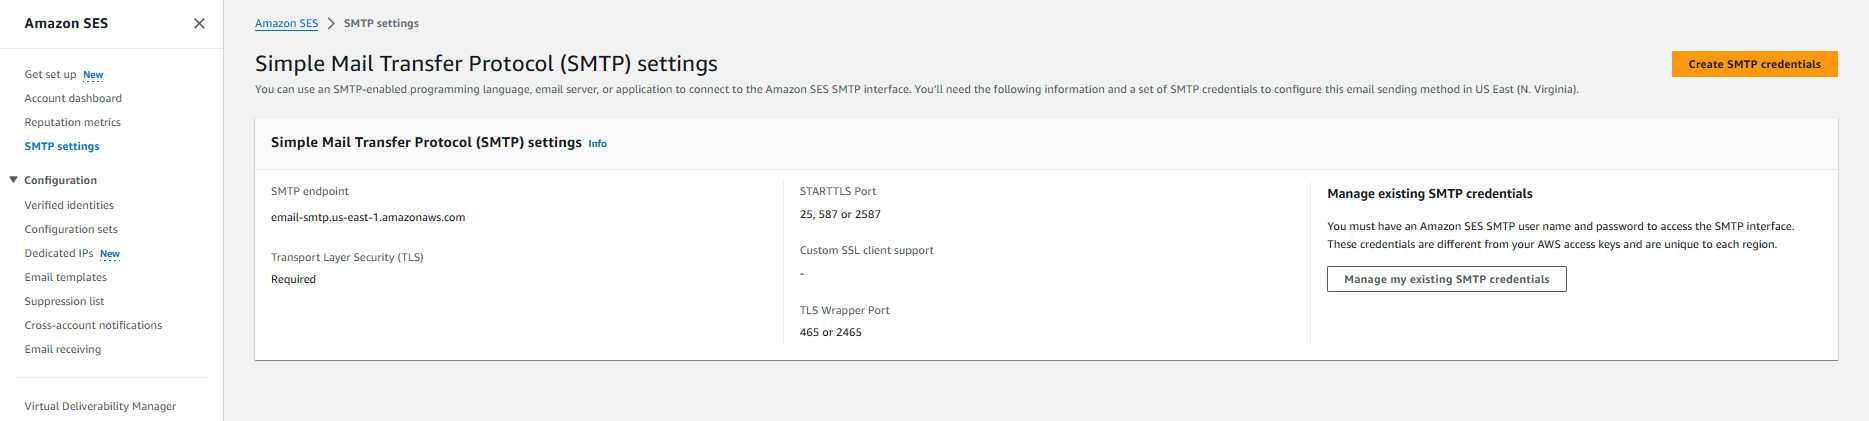
Select "Create SMTP credentials" located at the top right of the page.
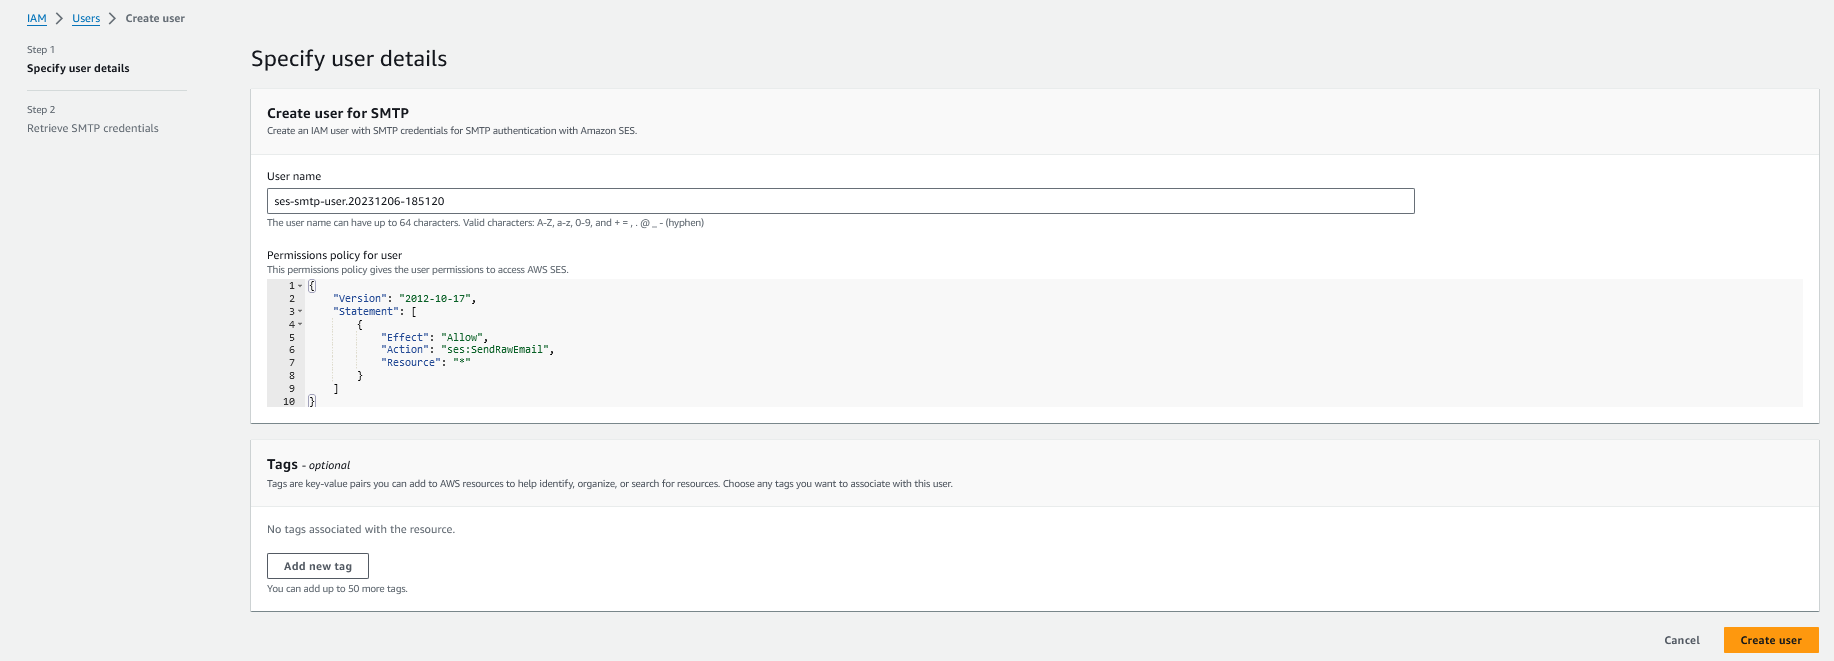
You can keep the auto-generated user name or change it to something more related to the project. I'll keep this as the default.
Click "Create user" at the bottom right of the page.
Retrieve SMTP credentials

This page will show up after creating the new user. On this page you'll find your new SMTP user name and your new SMTP password.
Note down your SMTP user name and SMTP password in a secure place.

Add your Amazon SES SMTP Account to Mailcow
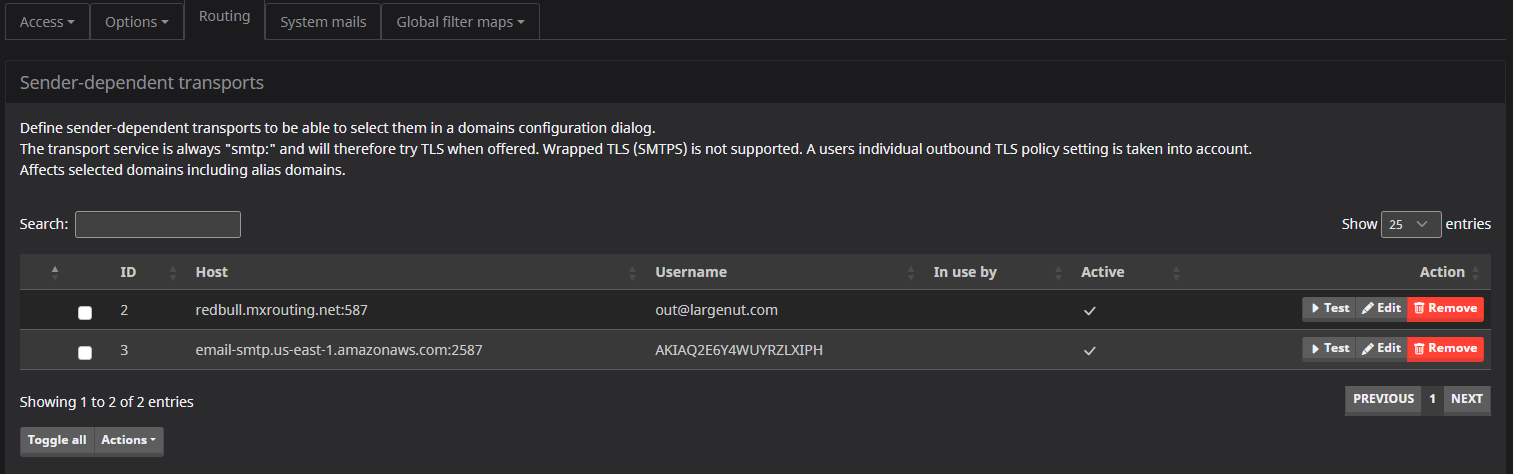
Mailcow will refer to a relayhost as a "Sender-dependent transport".
Navigate to the Routing tab under System > Configuration.
Scroll down to the "Add sender-dependent transport" section.
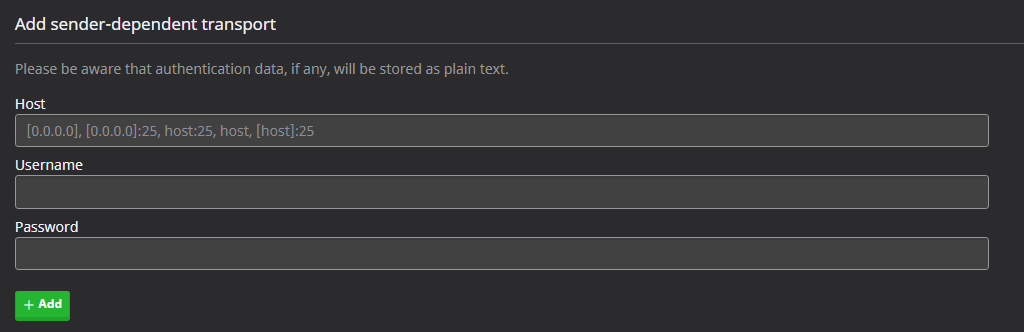
These settings will come from the SMTP settings page in your Amazon SES Console.
You'll need the SMTP endpoint for the region you selected in AWS. Select a STARTTLS Port from the list provided under "STARTTLS Port"
Fill these details in and click "+ ADD" in Mailcow.

The new sender-dependent transport (Amazon SES) will now show up under the sender-dependent transports list above.
Test Sender-Dependent Transport
While still in the Sender-dependent transports page for Mailcow, on the right-hand side you'll select the "Test" button. Set a mail account in your domain to send from in the "From: Address" field, then leave the "To: address" field empty.
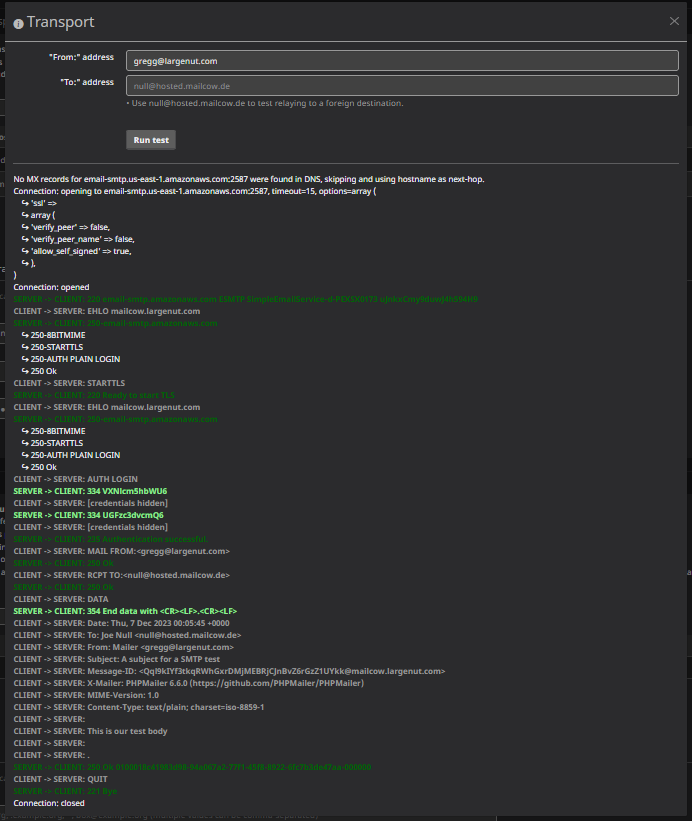
We can see that the test passed so we know we are good to use Amazon SES to start sending mail for our domain.
Add Sender Dependent Transport to your Domain
We now have Amazon SES configured and working in our Mailcow environment. At this point we can go ahead and add the new sender-dependent transport to the domain configuration.
In Mailcow, navigate to Email > Configuration > Domains.
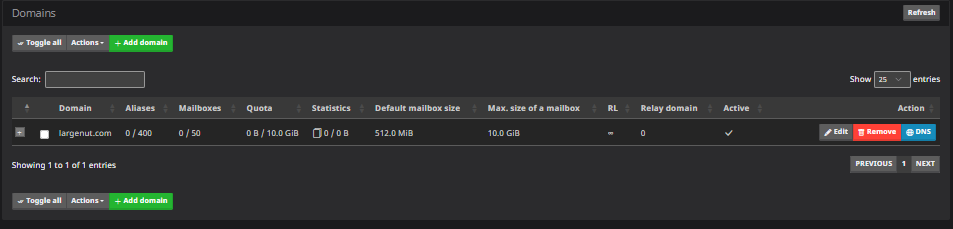
Select "Edit"
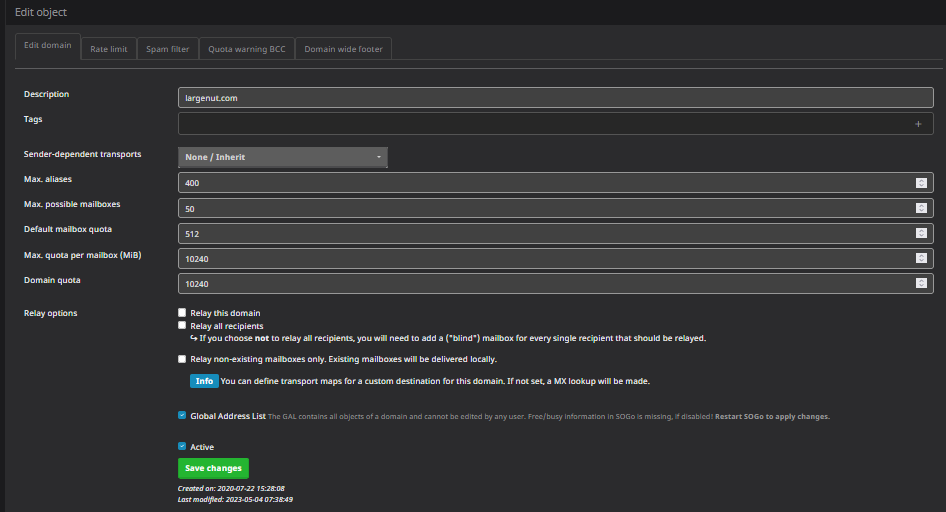
Under "Edit domain", click the drop-down for "Sender-dependent transports".
Select your AWS sender-dependent transport created in the earlier step.

Click "Save changes"
This completes the configuration of Amazon SES as a sender-dependent transport for a Mailcow domain. Your domain's accounts in Mailcow should now route all outgoing SMTP through Amazon SES.