Ghost Blog Security: Implement Cloudflare Access for MFA
Adding Cloudflare Access to Ghost Blog admin for an additional layer of security


I got started with Ghost as a simple blogging platform. One thing that Ghost appears to lack is any form of MFA - Multi-factor Authentication. To solve this issue, I'll be setting up this blog to use Cloudflare as a proxy so we can also use Cloudflare as a WAF and for Cloudflare Access (Zero Trust) features.
Cloudflare Access has a free tier that will allow us to perform a basic MFA against configured application URLs which are proxied through Cloudflare.
Getting Started
For the initial setup, the domain must be active in a Cloudflare account that you can manage.
If you do not already have a Cloudflare account or your domain is not set-up in Cloudflare, take a look at their setup guide: https://developers.cloudflare.com/fundamentals/setup/
Connecting Cloudflare to your app
A strong consideration is security by obscurity often is not a good route to take. This step covers only allowing Cloudflare access to your Nginx front-end or connecting your app directly to Cloudflare using a Cloudflare Zero-Trust tunnel.
Option 1:
Setting up nginx to only allow Cloudflare IP ranges
For building the allow/deny list, we will use a script that will run as a crontab in an interval. This will ensure the allow/deny list is up to date with Cloudflare's IP ranges.
cd /etc/nginx
mkdir -p ./scripts
cd ./scripts
nano generate-nginx-cloudflare-allow.sh
#!/bin/bash
set -e
cf_ips() {
echo "# https://www.cloudflare.com/ips"
for type in v4 v6; do
echo "# IP$type"
curl -s "https://www.cloudflare.com/ips-$type" | sed "s|^|allow |g" | sed "s|\$|;|g"
echo
done
echo "# Generated at $(LC_ALL=C date)"
}
cf_ips > allow-cloudflare.conf
(cf_ips && echo "deny all; # deny all remaining ips") > allow-cloudflare-only.confgenerate-nginx-cloudflare-allow.sh
Run the script to create the initial allow list under /etc/nginx/scripts/allow-cloudflare-only.conf
sh /etc/nginx/scripts/generate-nginx-cloudflare-allow.shAdd a crontab to run this script on intervals - I'm using every day at midnight.
crontab -e
0 0 * * * sh /etc/nginx/scripts/generate-nginx-cloudflare-allow.shAdd allow-cloudflare-only.conf to host blocks
Example - add the line 'include /etc/nginx/scripts/allow-cloudflare-only.conf;' to any http, server, or location block as needed:
nano /etc/nginx/sites-enabled/example.com.confhttp{
...
include /etc/nginx/scripts/allow-cloudflare-only.conf;
...
}
server{
...
include /etc/nginx/scripts/allow-cloudflare-only.conf;
...
}
location / {
include /etc/nginx/scripts/allow-cloudflare-only.conf;
}Option 2: Cloudflare Zero-Trust Tunnel
Cloudflare tunnels are a simple and secure option to connect your app directly to Cloudflare. This method requires no port or public IP exposure. This option also assumes you are running Ghost as a container and have an existing docker-compose.yml file.
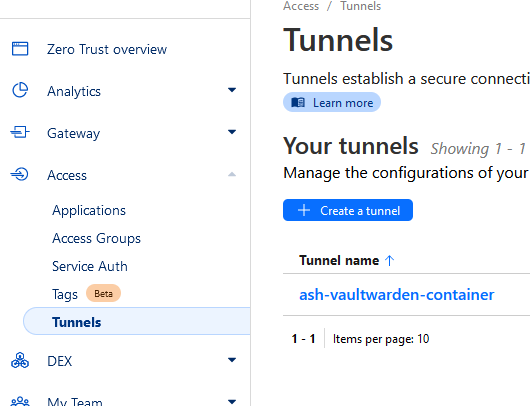
Login to Cloudflare and select Zero Trust > Access > Tunnels > Create a tunnel:
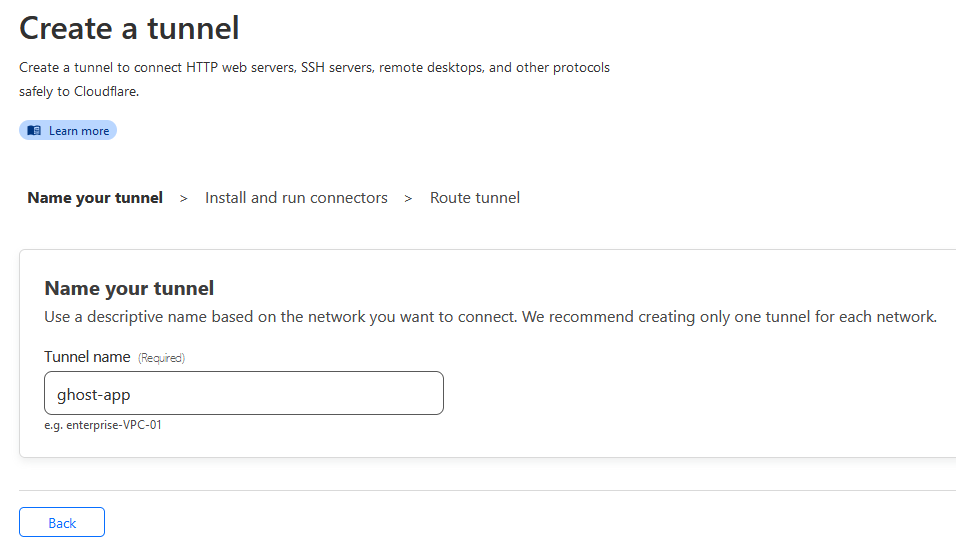
Complete the tunnel creation process:
Note down the tunnel connector authentication token:
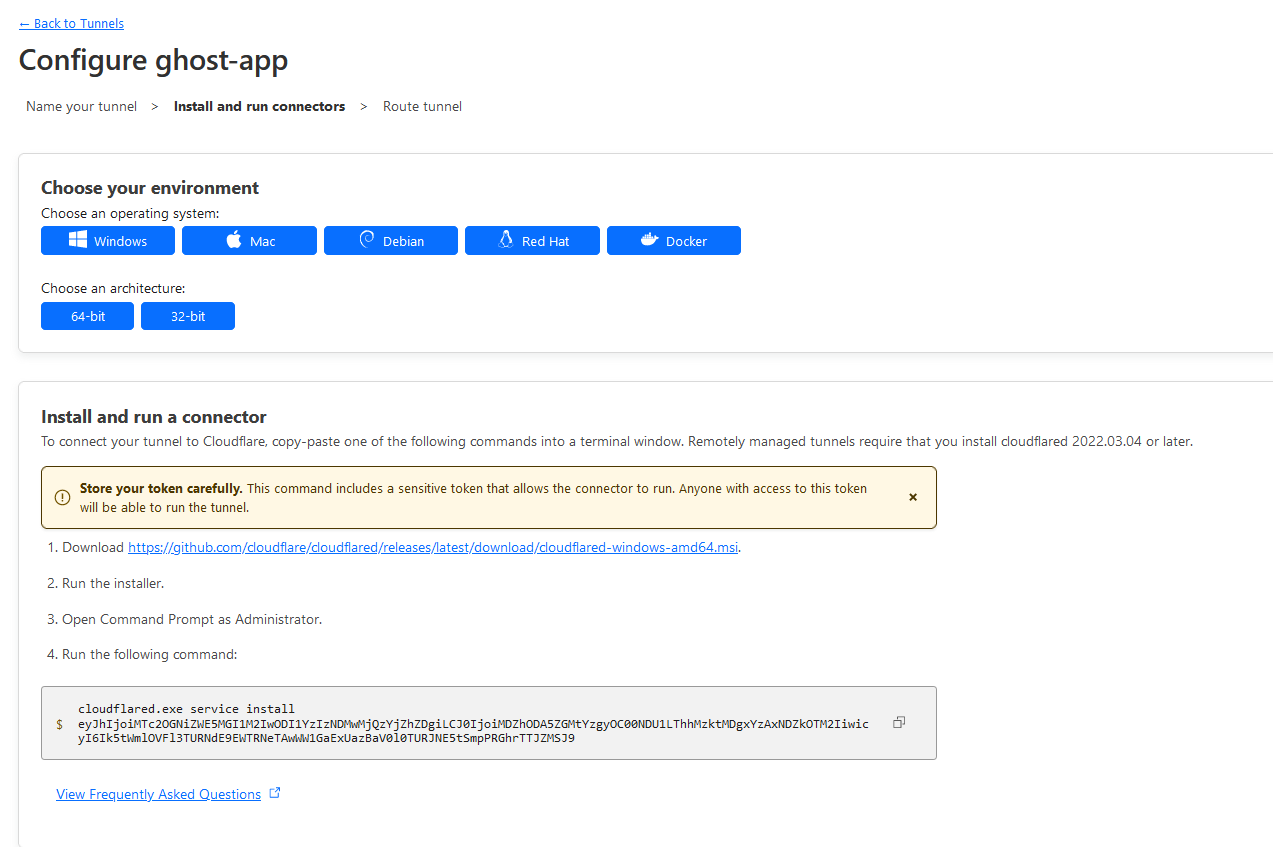
In this case the token portion will be the string under cloudflared.exe service install in step 4 of "Install and run connector":
eyJhIjoiMTc2OGNiZWE5MGI1M2IwODI1YzIzNDMwMjQzYjZhZDgiLCJ0IjoiMDZhODA5ZGMtYzgyOC00NDU1LThhMzktMDgxYzAxNDZkOTM2IiwicyI6Ik5tWmlOVFl3TURNdE9EWTRNeTAwWW1GaExUazBaV0l0TURJNE5tSmpPRGhrTTJZMSJ9Note: Your token will be different. Take note of your token for the next step.
Add Cloudflared container to your existing compose app using the noted Cloudflare tunnel token:
This example shows my entire compose file for this project, but we only care about the ghost-tunnel container.
nano docker-compose.ymlversion: "3.3"
services:
ghost-app:
container_name: ghost-app
image: ghost:latest
restart: always
ports:
- 2368:2368
depends_on:
- ghost-mariadb
environment:
url: https://largenut.com
database__client: mysql
database__connection__host: ghost-mysql
database__connection__user: ghost
database__connection__password: changethis
database__connection__database: ghost
volumes:
- ./content:/var/lib/ghost/content
ghost-mysql:
container_name: ghost-mysql
image: mysql:8
restart: always
environment:
MYSQL_ROOT_PASSWORD: changethis
MYSQL_USER: ghost
MYSQL_PASSWORD: changethis
MYSQL_DATABASE: ghost
volumes:
- ./mysql8:/var/lib/mysql
ghost-tunnel:
container_name: ghost-tunnel
image: cloudflare/cloudflared
restart: unless-stopped
command: tunnel run
environment:
- TUNNEL_TOKEN=eyJhIjoiMTc2OGNiZWE5MGI1M2IwODI1YzIzNDMwMjQzYjZhZDgiLCJ0IjoiMDZhODA5ZGMtYzgyOC00NDU1LThhMzktMDgxYzAxNDZkOTM2IiwicyI6Ik5tWmlOVFl3TURNdE9EWTRNeTAwWW1GaExUazBaV0l0TURJNE5tSmpPRGhrTTJZMSJ9
Bring up your compose project with the new container:
docker compose up -dVerify tunnel is showing an up status in the Cloudflare setup webpage.
Add route for traffic to Cloudflare Tunnel
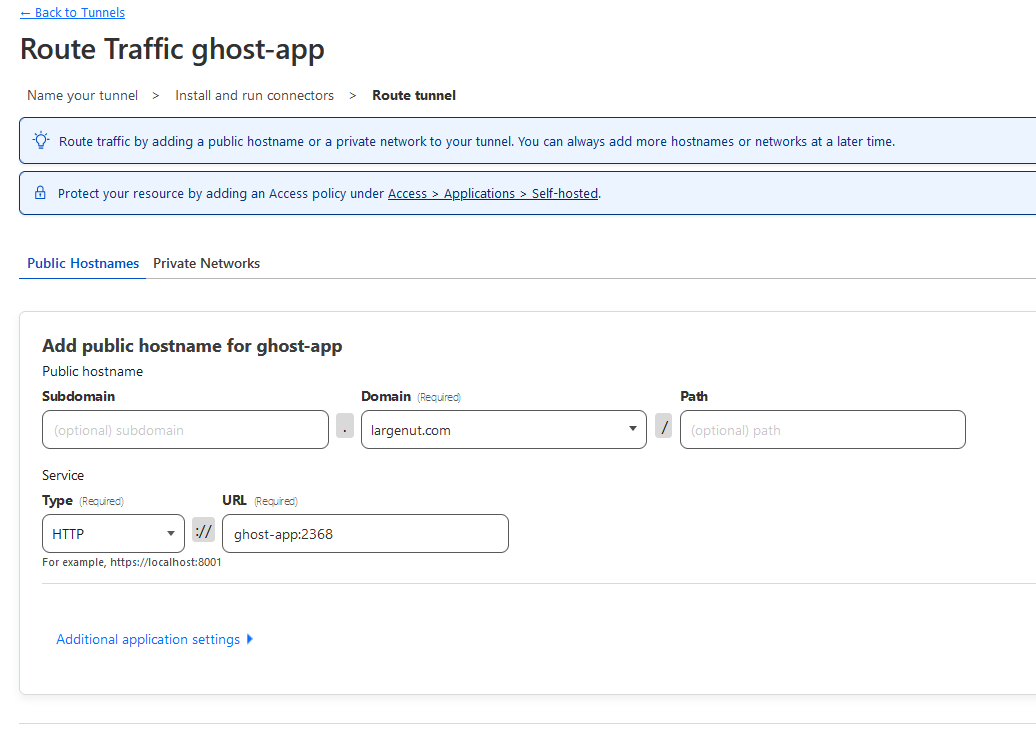
Select your domain.
Set type to HTTP
Set URL to container-name:2368. In my case, this will be ghost-app:2368.
Save tunnel.
If you get any errors stating that DNS records exist, just go ahead and remove the DNS records if they do exist, as the tunnel setup tool will automatically add these back with the tunnel CNAME
Your tunnel should be active and ready for use.
Setup Cloudflare Access
Under Cloudflare Zero Trust > Access > Access Groups > Add a group
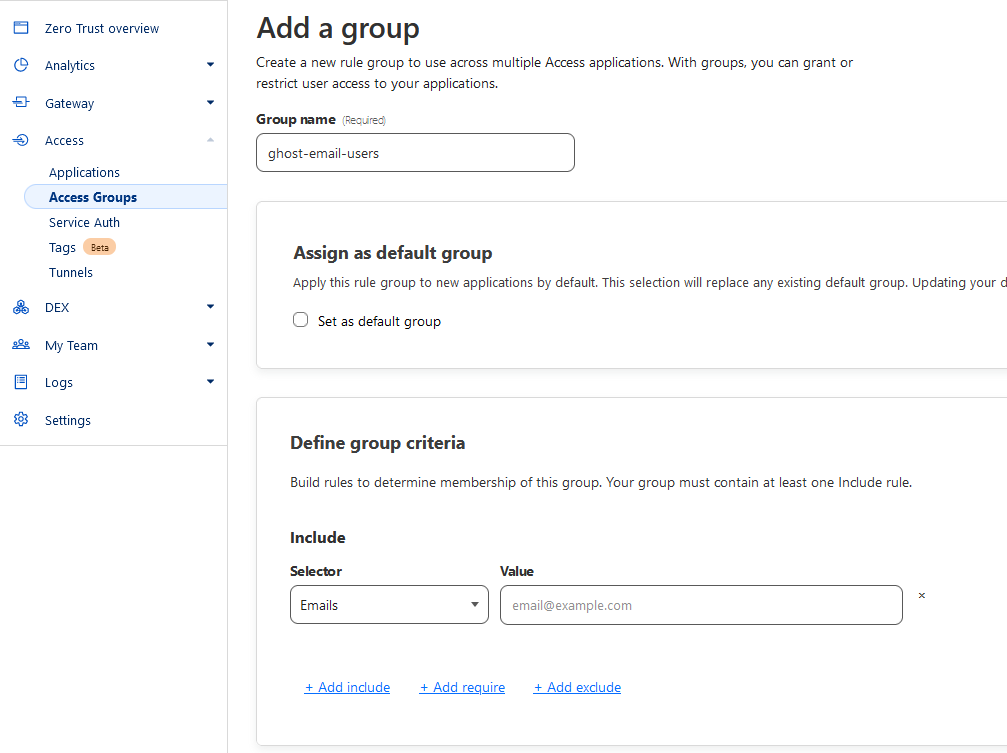
Set group name
Under Define group criteria:
Selector: Emails
Value: Your email address to receive MFA codes from Cloudflare
Save
Under Zero Trust > Access > Applications:
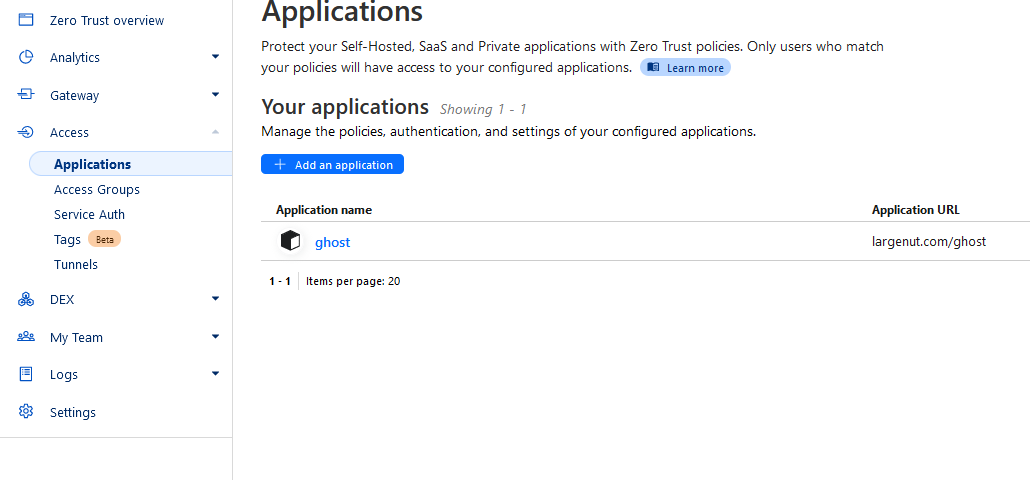
Select "Add an application"
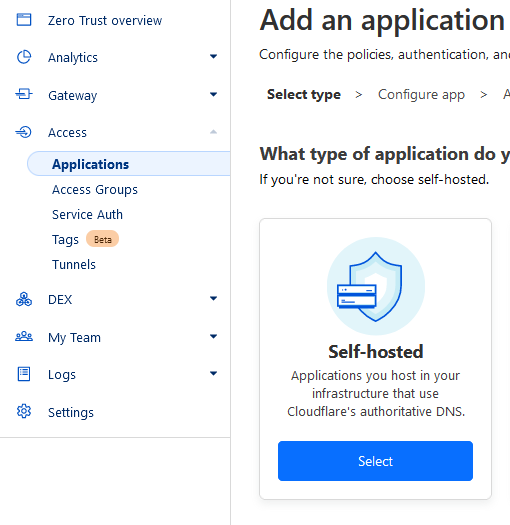
Select "Self-hosted"
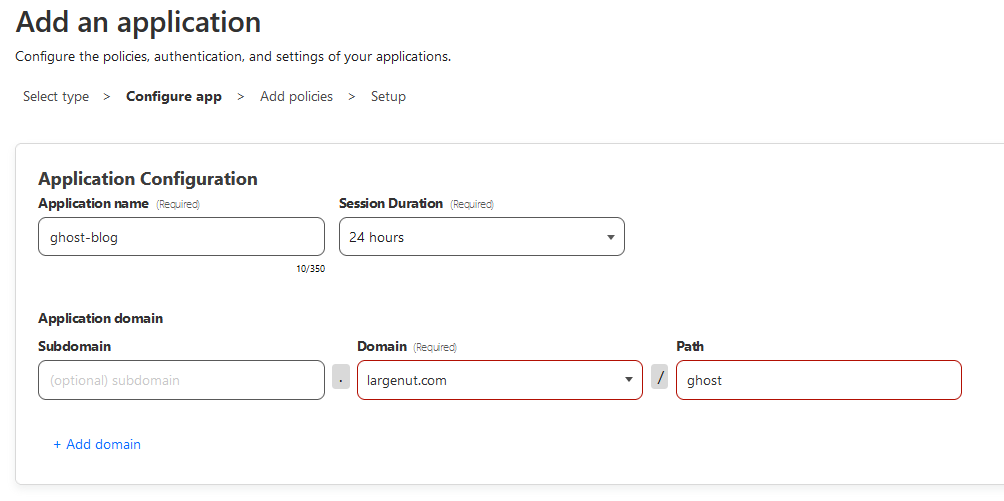
Application name: ghost-blog (or anything)
Domain: set to your domain or subdomain used to host Ghost
Path: Set to 'ghost' - ghost is the path of the "admin" interface for ghost
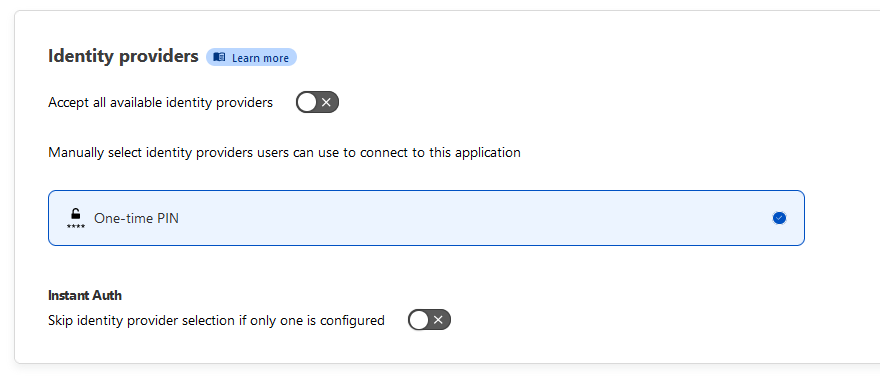
Set Identity providers to the following:
Accept all available identity providers: off
One-time PIN should be default enabled
Click next.
Add policy and assign group
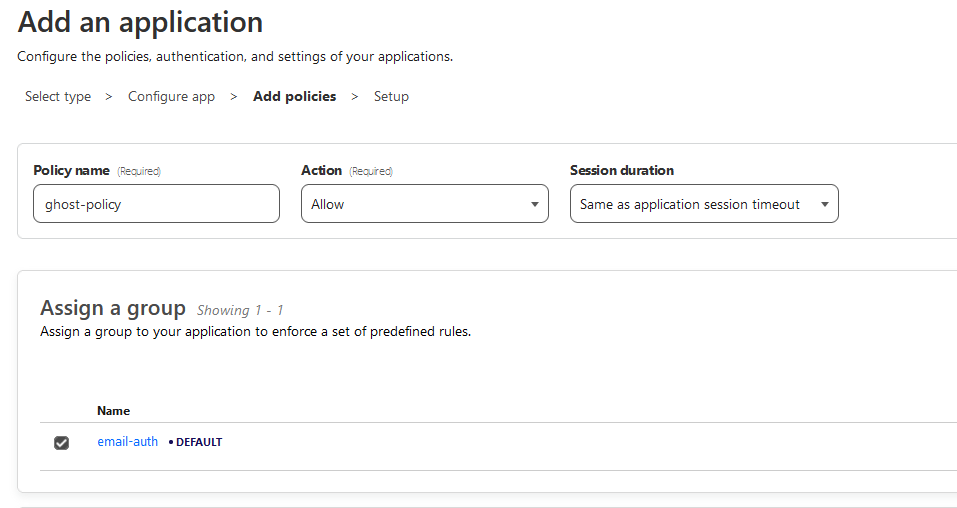
Set a policy name and assign the group you created in the previous step.
Click next.
Setup
Scroll down this final page of the setup, click "Add application"
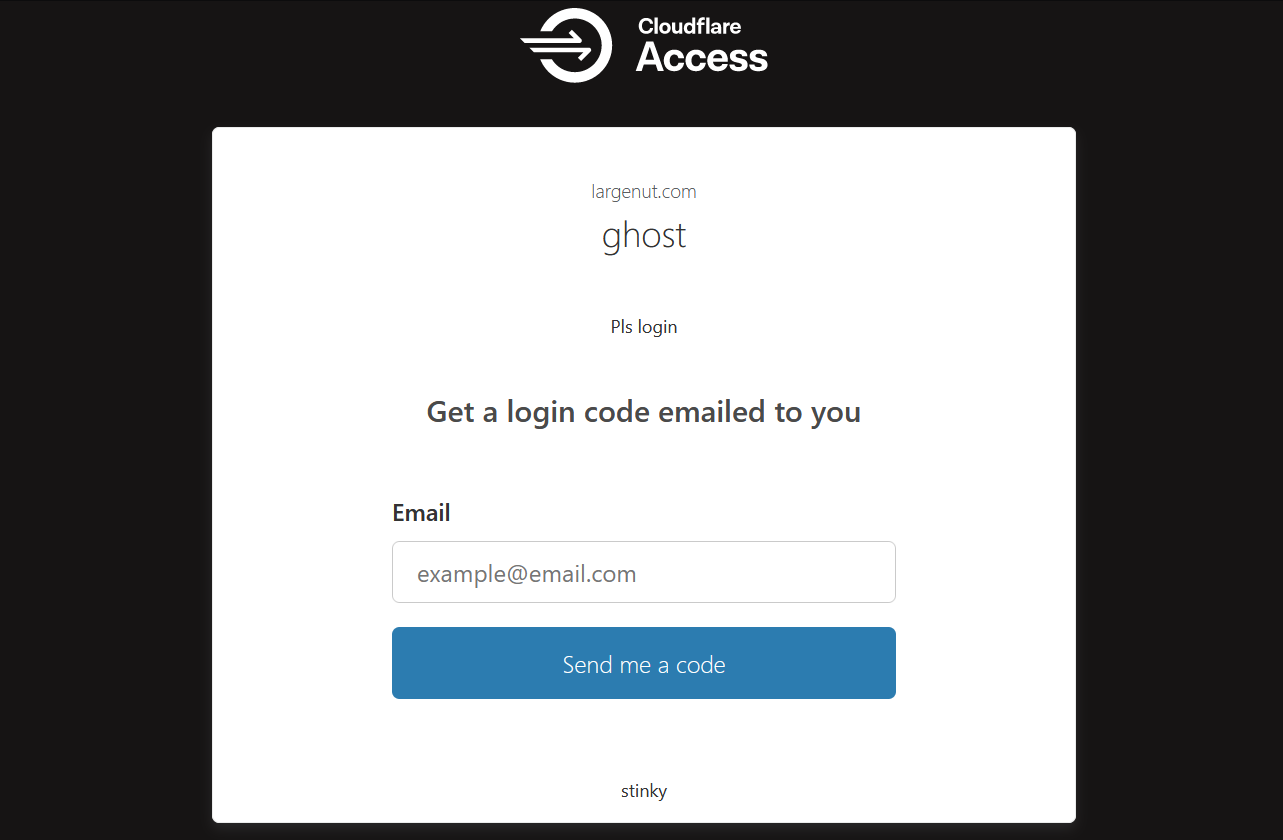
Verify Cloudflare Access is working by navigating to your blog /ghost path. Live example: https://largenut.com/ghost